A2: Azure IoT Hub#
Overview#
In this assignment, we will build on the project work. This is an individual task done in your project repo.
(30%) Subsystem improvements#
(10%) Dashboard/backend autostart#
autostart backend and dashboard processes at boot with
systemdAdapt these instructions from Adafruit for enabling a systemd process that runs on boot: https://learn.adafruit.com/running-programs-automatically-on-your-tiny-computer/systemd-writing-and-enabling-a-service
to run a web app in fullscreen from a script: use
firefox kioskalong withbunto start your dashboard
Goal: when your reterminal turns on, the dashboard and backend should autostart in fullscreen.
(20%) Choose your adventure#
Choose one of the following options:
Unit testing for all devices, incorporated into CI/CD
IDEA: ensure that all sensors/actuators have unit test coverage
IDEA: ensure your backend code has unit test coverage
reTerminal features (see the grove documentation
buzzer (actuator)
built-in accelerometer (sensor)
backlight (sensor)
buttons (actuators)
IDEA: incorporate the above features of the reterminal into your subsystem dashboard/backend.
Other extra cool features of a similar complexity to above
Learning to use IoT Features#
To begin implementing the IoT Features on your subsystem, follow the following instructional steps:
Setup#
Read and complete up to and including Part 1: Azure Setup of the App Dev Milestone 4: App Dev Milestone 4 instructions
Afterwards, you should have:
an IoT Hub
At least one named device on your IoT Hub
Eventually, everyone should three devices (one for each teammate in the project). See the figure below.
A connection string for that IoT Hub
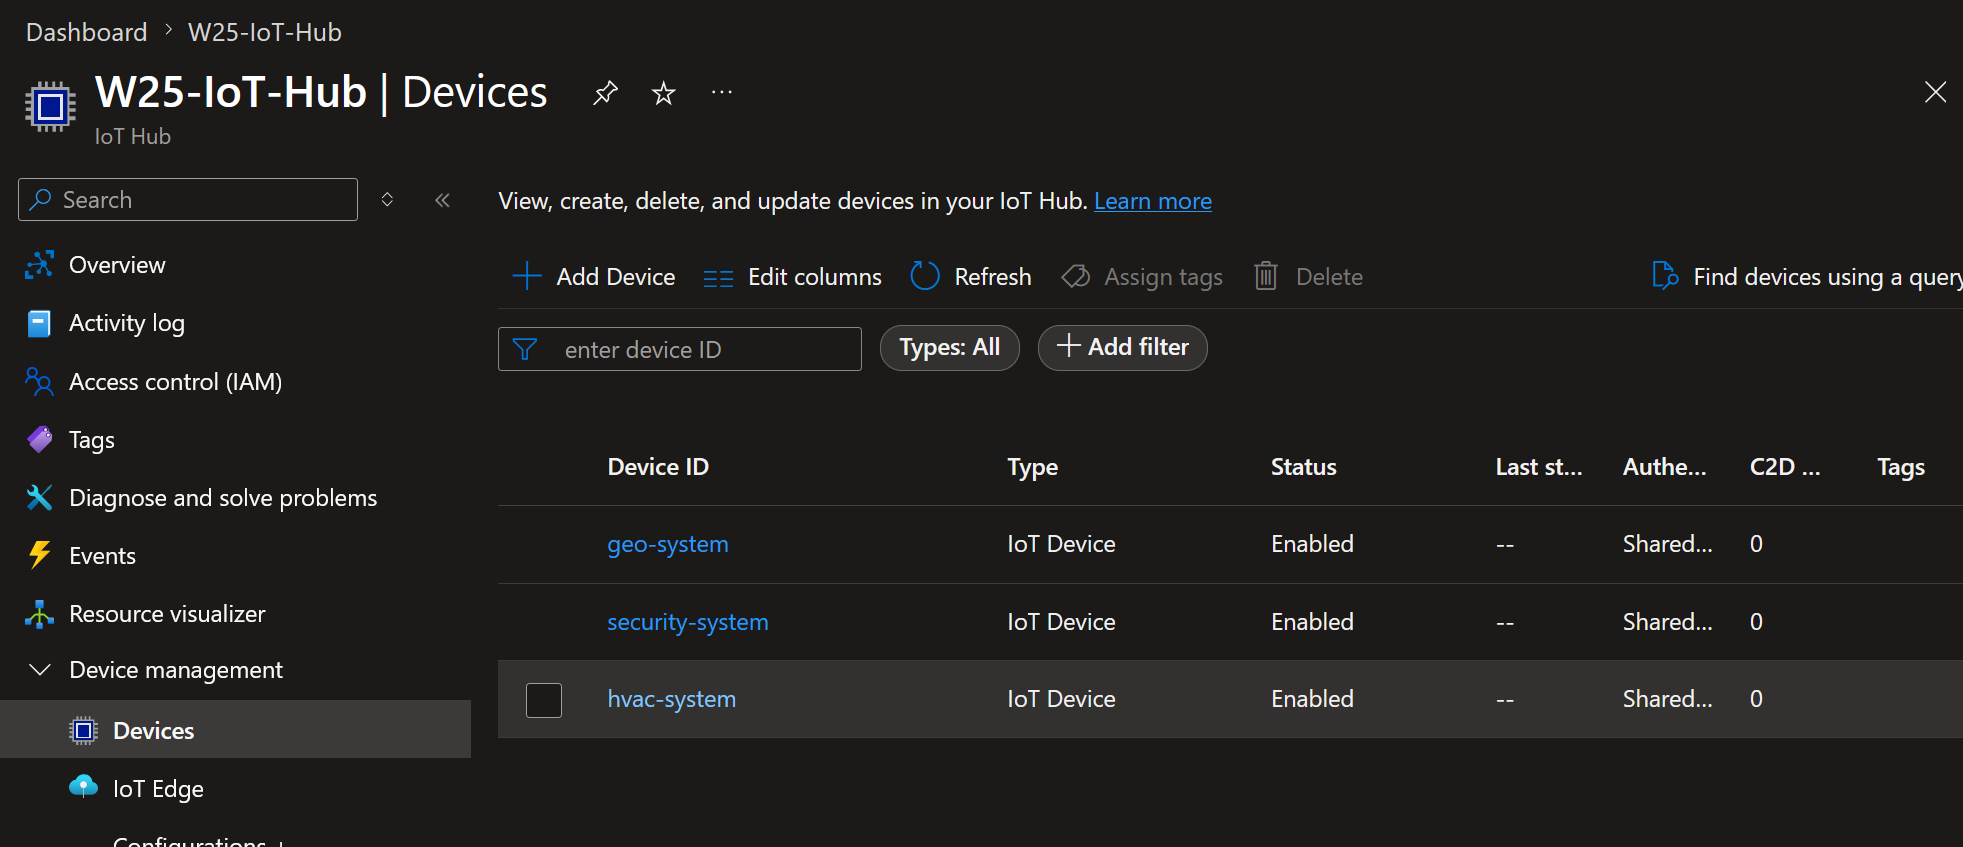
Your Azure IoT Hub should look something like this when you are done creating devices for yourself and your teammates.#
Every team member should create devices for each of the subsystems in your project on their own Azure IoT Hub.
Install Azure CLI#
One tool that will be invaluable for us is the Azure CLI. You can install it on your developer environment and/or your reterminal.
First, install azure CLI. See installation instructions (Debian)
Recommended: “Option 1: Install with one command”
Login to azure cli on the machine you have installed it:
$ az login

# If the above doesn't work:
$ az login --use-device-code
Install the
azure-iotextention:az extension add --name azure-iot
To test that your azure cli is authenticated, try getting your device connection string from the cli:
# Note: for the code below to work exactly as printed
# you need to define environment variables in your shell.
az iot hub device-identity connection-string show --device-id ${IOTHUB_DEVICE_NAME} --hub-name ${IOTHUB_NAME}
See the Azure CLI cheatsheet in the course notes for more detail on how to get your device connection string from the CLI.
Note
Getting fancy: you can pipe commands like the above to your clipboard like we learned in the beginning of the semester:
command | grep connectionString | cut -f 4 -d " " | <wl-copy OR clip.exe>
Sample Device Code#
Before we change the code of our own subsystems, lets use a “Plug-n-Play” implementation from Azure to see how everything should work.
The goal here is to:
run python code that sends telemetry updates to Azure IoT about a subsystem
run python code that can receive direct method requests and respond to them.
Follow the steps below:
Git clone the following repo, either on your reterminal or your developer environment
Navigate to the
samples/pnp/directoryYou will need to create a virtual environment in this directory (use either
uvorpython -m venv) to install any needed dependenciesIn that virtual environment, install the package
azure-iot-deviceYou will need to set the following environment variables. Run these commands in the same shell that you will execute the python code:
$ export IOTHUB_DEVICE_CONNECTION_STRING="<your connection string here>"
$ export IOTHUB_DEVICE_SECURITY_TYPE="connectionString"
Run the provided sample (
temp_controller_with_thermostats.py)
Note
You can set environment variables like IOTHUB_DEVICE_CONNECTION_STRING in a .env file.
Instructions for this follow later in this assignment instruction set.
You should see console output similar to the following:
Connecting using Connection String <redacted>
Updating pnp properties for root interface
{'serialNumber': 'some_serial_number'}
Updating pnp properties for thermostat1
{'thermostat1': {'maxTempSinceLastReboot': 98.34, '__t': 'c'}}
Updating pnp properties for thermostat2
{'thermostat2': {'maxTempSinceLastReboot': 48.92, '__t': 'c'}}
Updating pnp properties for deviceInformation
{'deviceInformation': {'swVersion': '5.5', 'manufacturer': 'Contoso Device Corporation', 'model': 'Contoso 4762B-turbo', 'osName': 'Mac Os', 'processorArchitecture': 'x86-64', 'processorManufacturer': 'Intel', 'totalStorage': 1024, 'totalMemory': 32, '__t': 'c'}}
Listening for command requests and property updates
Press Q to quit
Command name is: reboot
Command name is: thermostat1*getMaxMinReport
Command name is: thermostat2*getMaxMinReport
Sending telemetry from various components
Sent message
{"temperature": 29}
Sent message
{"temperature": 45}
...
Keep this process running – what we’re going to do now is verify that this device code is indeed connected to the Azure IoT Hub.
Verify the telemetry#
When the device is running, it should be sending telemetry updates every 8 seconds. You can see this in the device code console.
Let’s verify that these messages are being sent to your IOT Hub.
In another terminal, run the az iot hub monitor-events command to monitor events sent from the device to your IoT hub.
# Note: for the code below to work exactly as printed
# you need to define environment variables in your shell.
$ az iot hub monitor-events --output table -d ${IOTHUB_DEVICE_NAME} -n ${IOTHUB_NAME}

Starting event monitor, filtering on device: mydevice, use ctrl-c to stop...
event:
  component: ''
  interface: dtmi:com:example:TemperatureController;1
  module: ''
  origin: mydevice
  payload: '{"workingSet":1251}'

event:
  component: thermostat1
  interface: dtmi:com:example:TemperatureController;1
  module: ''
  origin: mydevice
  payload: '{"temperature":22.00}'
See the Azure CLI cheatsheet in the course notes for more detail on how to monitor messages sent to your Azure IoT Hub
Verify the direct methods invocations#
From the initial logs of the sample code, we can see the following lines:
Command name is: reboot
Command name is: thermostat1*getMaxMinReport
Command name is: thermostat2*getMaxMinReport
These are three different direct methods that the device code is configured to respond to requests for.
We are going to invoke each of these direct methods to see how they work.
While the device code is running, in another terminal, use Azure CLI to invoke the direct methods.
# Note: for the code below to work exactly as printed
# you need to define environment variables in your shell.
$ az iot hub invoke-device-method --mn ${METHOD_NAME} -d ${IOTHUB_DEVICE_NAME} -n ${IOTHUB_NAME}
You should see logs in BOTH your device code terminal session AND the azure cli terminal, indicating that the method was called and handled successfully.
Try all three of the defined direct methods:
Command name is: reboot
Command name is: thermostat1*getMaxMinReport
Command name is: thermostat2*getMaxMinReport
See the Azure CLI cheatsheet in the course notes for more detail on how to invoke the direct method and the expected response.
(50%) IoT Features to Implement#
Before beginning these features, make sure you have done all the steps of the Learning to Use Azure IoT above!.
(10%) Azure IoT Device Client setup#
In the backend of your reterminal code, you will need to initialize an
IoTHubDeviceClient (link to documentation).
This object will connect to your Azure IoT hub using a connection string.
See the
create_from_connection_string
method in the documentation.
Connection String#
You should set
this connection string in a .env file accessible to your subsystem.
Important
DO NOT commit .env with your connection string to github!
You should add .env to your .gitignore.
You can create a .env_example file to document what environment variable keys you are
expecting someone running your system to have handy.
IOTHUB_DEVICE_CONNECTION_STRING="<your connection string here>"
IOTHUB_DEVICE_SECURITY_TYPE="connectionString"
Note
Suggestion: you can also set other useful environment variables in .env too –
IOTHUB_NAME, IOTHUB_DEVICE_NAME, etc.
(20%) Subsystem Telemetry#
Each subsystem should sent sensor and actautor status reports on a regular basis (once every 15 minutes).
Helpful examples:
From the tutorial:
send_telemetry_from_temp_controllerandcreate_telemetryProject code from previous iterations of this class
Your subsystem should implement this technique for all of its sensors.
(20%) Direct Methods#
Use the on_method_request_received
property of the IoTHubDeviceClient to implement the following direct methods:
is_online:Name:
is_onlinePayload: No payload required.
The direct method response should include:
200 codeif the method name matchesis_online(No payload required).400 codeif a different method name is used. Payload:{ "details": "method name unknown" }
The direct method request should also be logged to the console of the reTerminal.
control_actuator:Name:
control_actuatorPayload: JSON with the actuator name and the action to take
For example, if your IOT subsystem has a fan, then a direct method invocation similar to below using azure cli should work:
az iot hub invoke-device-method --mn control_actuator -d ${IOTHUB_DEVICE_NAME} -n ${IOTHUB_NAME} --payload "{action: FAN_TOGGLE, value: 1}"This should result in the fan turning on.
The direct method response should include:
200 codeif the control_actuator method is called successfully. Payload:{ "actuator_name": "new_state" }400 codeif the action or value, or anything about the –payload , is invalid.
Helpful examples:
Project code from previous iterations of this class
(20%) Documentation#
README for subsystem
includes documentation about device telemetry
includes documentation about direct method invocation
README for each device
pyproject.tomlup to date with all required dependencieslinting/formatting